Listen to the sound of a structural failure that tastes like victory. It is the high-pitched snap of a perfectly dehydrated crust yielding to a soft, pillowy interior. We are not merely baking; we are engineering a masterpiece of longitudinal elasticity. The Curly Breadsticks in question are a marvel of culinary physics. They represent the intersection of high-protein gluten development and the centrifugal force of a manual twist. When you pull these golden spirals from the heat, the aroma of toasted yeast and browned butter should saturate the room like a fragrant fog. This is about more than a side dish. It is about the tension held within a dough rope and the Maillard reaction that transforms pale starch into a mahogany treasure. We demand a crumb that is airy yet resilient. We require a surface tension that shatters upon impact. If you are looking for a limp, uninspired carb, look elsewhere. We are here to audit your kitchen infrastructure and elevate your dough game to professional standards.
THE DATA MATRIX
| Metric | Specification |
|---|---|
| Prep Time | 25 Minutes |
| Execution Time | 15 Minutes |
| Yield | 12 Units |
| Complexity (1-10) | 6 |
| Estimated Cost per Serving | $0.45 |
THE GATHERS
Ingredient Protocol:
- 500g / 4 cups High-Protein Bread Flour
- 325ml / 1.3 cups Filtered Water (tempered to 105F)
- 10g / 2 tsp Active Dry Yeast
- 15g / 1 tbsp Granulated Sugar
- 10g / 2 tsp Fine Sea Salt
- 50g / 3.5 tbsp Unsalted Butter (melted and cooled)
- 5ml / 1 tsp Diastatic Malt Powder (optional for crust depth)
- Topping: 30g / 2 tbsp Melted Butter infused with Garlic Powder and Coarse Salt
Section A: Ingredient Quality Audit:
The most common failure point in Curly Breadsticks is the use of "dead" yeast or low-protein "all-purpose" flour. If your yeast does not aerate the water within five minutes, discard it. The infrastructure requires a protein content of at least 12.5 percent to maintain the spiral shape under thermal stress. If your flour is too weak, the gluten strands will snap during the twisting process. To fix a low-protein flour, you can add 10g of vital wheat gluten to the dry mix. Furthermore, ensure your water is filtered; chlorine can inhibit yeast activity and lead to a muted flavor profile. If the dough feels too viscous or sticky, resist the urge to dump in excess flour. Instead, allow for a longer autolyse period to let the hydration fully penetrate the starch granules.
THE MASTERCLASS
1. Hydration and Activation
Combine the tempered water, sugar, and yeast in the bowl of a stand mixer. Let it sit until a thick foam forms on the surface. This indicates the yeast is metabolizing the sucrose and producing carbon dioxide.
Pro Tip: Use a digital scale for all measurements. Volume is the enemy of consistency. Precise hydration ratios ensure the dough has the exact tensile strength needed for a tight spiral.
2. Gluten Development
Add the flour, salt, and malt powder. Using the dough hook attachment, knead on low speed for 8 to 10 minutes. The dough should clear the sides of the bowl and pass the "windowpane test" where a small piece can be stretched thin enough to see light through it without tearing.
Pro Tip: Use a bench scraper to manage the dough on your work surface. This tool prevents the warmth of your hands from prematurely melting the fats in the dough, which would compromise the final crumb structure.
3. The Primary Fermentation
Place the dough in a lightly oiled bowl and cover with a damp cloth. Allow it to double in size in a warm, draft-free environment. This usually takes 60 to 90 minutes depending on your ambient kitchen temperature.
Pro Tip: A saucier filled with boiling water placed at the bottom of a turned-off oven creates an ideal proofing chamber. The humidity prevents a skin from forming on the dough, allowing for maximum expansion.
4. Precision Shaping and Twisting
Degas the dough gently. Divide into 60g portions. Roll each portion into a long rope, approximately 12 inches in length. Hold one end stationary and twist the other end multiple times before folding the rope in half. The tension will cause the dough to naturally coil into the signature Curly Breadsticks shape.
Pro Tip: Work on a non-floured surface if possible. A slight grip on the table helps create the friction necessary to roll a uniform rope. If the dough snaps back, let it rest for five minutes to relax the gluten.
5. The Thermal Transformation
Arrange the spirals on a parchment-lined sheet. Brush with a light coating of the butter infusion. Bake at 425F (218C) for 12 to 15 minutes until the exterior reaches a deep, golden hue.
Pro Tip: Use an infrared thermometer to check your oven floor temperature. Hot spots can cause uneven browning. Rotating the pan 180 degrees halfway through the bake ensures a symmetrical Maillard reaction across all units.
Section B: Prep & Timing Fault-Lines:
Timing is the silent killer of texture. If you over-proof the shaped breadsticks, the internal gas pressure will exceed the strength of the gluten walls, causing the spirals to collapse into flat, sad ribbons. Conversely, under-proofing results in "oven spring" so violent that the breadsticks might split at the seams. Always monitor the dough visually rather than relying solely on a clock. Temperature control is equally vital. If your kitchen is below 68F, fermentation will crawl. If it is above 80F, the yeast may produce off-flavors that taste unpleasantly alcoholic.
THE VISUAL SPECTRUM
Section C: Thermal & Visual Troubleshooting:
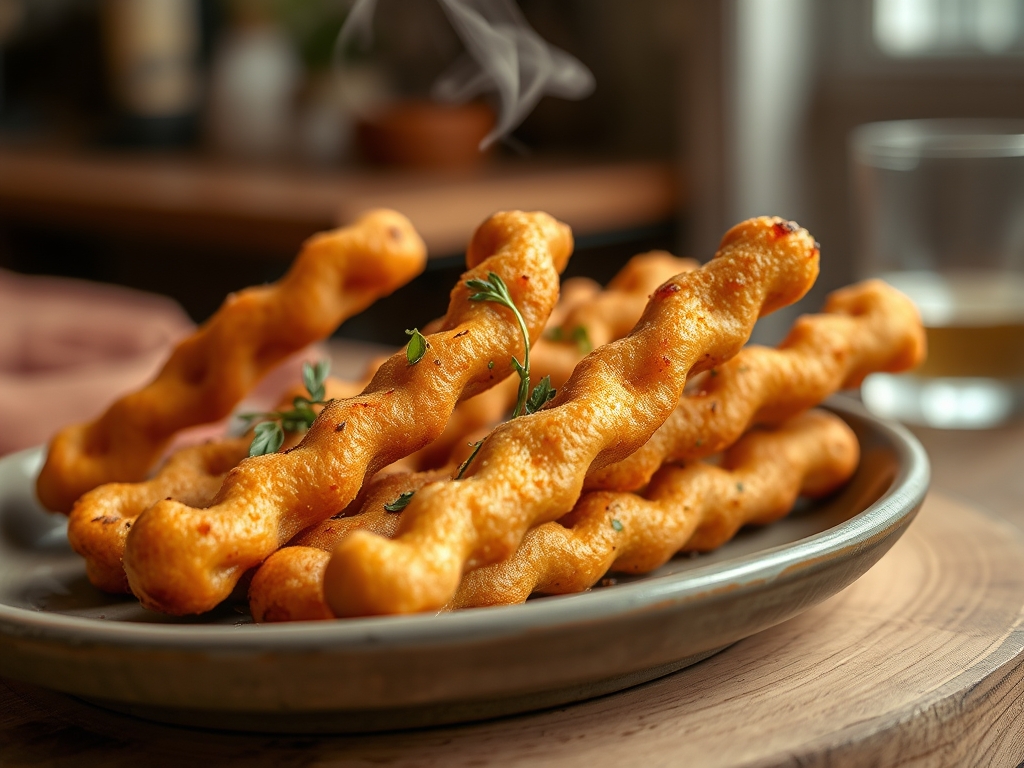
Referencing the Masterclass photo, observe the high-contrast browning on the ridges of the twists. If your breadsticks look pale and monochromatic, you likely missed the sugar in the dough or your oven temperature was too low to trigger the Maillard reaction. If the texture is tough rather than crisp, you may have over-worked the dough after the first rise, knocking out too much air. For those experiencing a "dull" finish, ensure you apply the butter wash immediately upon removal from the oven. This allows the fat to infuse into the crust while the surface is still porous from the heat. If the spirals uncoil during baking, the initial twist was not tight enough to lock in the kinetic energy of the dough.
THE DEEP DIVE
Macro Nutrition Profile:
Each unit contains approximately 180 calories, 4g of protein, 28g of carbohydrates, and 6g of fat. While primarily a carbohydrate source, the high-protein flour provides a modest amino acid boost.
Dietary Swaps:
For a Vegan iteration, substitute the butter with a high-quality olive oil or coconut oil and use agave nectar instead of granulated sugar. For Gluten-Free requirements, use a specialized 1:1 baking blend containing xanthan gum; however, be aware that the longitudinal elasticity will be significantly reduced, requiring a more delicate hand during the shaping phase. Keto versions can be achieved using almond flour and vital wheat gluten, though the flavor profile will shift toward a nuttier, denser experience.
Meal Prep & Reheating Science:
To maintain the molecular structure, do not microwave leftover breadsticks. Microwaves excite water molecules, leading to a rubbery texture as the starch undergoes rapid retrogradation. Instead, reheat in a 350F oven for 5 minutes. This "re-crisps" the exterior by evaporating surface moisture while gently warming the interior. For long-term storage, flash-freeze the shaped, unbaked dough. You can bake them directly from the freezer by adding 4 minutes to the total bake time.
THE KITCHEN TABLE
Why are my breadsticks dense?
Density usually stems from insufficient proofing or "killing" the yeast with water that was too hot. Ensure your water is between 100F and 110F. If the dough does not double in size during the first rise, the final product will be heavy.
Can I use honey instead of sugar?
Yes. Honey is a humectant and will actually help keep the breadsticks moist for a longer period. Use a 1:1 ratio. Note that honey browns faster than white sugar, so monitor the oven closely to prevent scorching.
How do I get that piquant garlic flavor?
The secret is to render the garlic flavor into the butter over low heat before brushing. Do not use raw garlic on the dough before baking, as it will burn and become bitter. Use garlic powder or infused fats for the best results.
My dough keeps shrinking back when I roll it. Help!
This is a sign of high gluten tension. Cover the dough with a towel and let it rest for 10 minutes. This allows the proteins to relax, making the dough much more extensible and easier to shape into long ropes.