Listen to the sound of the crust. It is not just a crackle; it is a structural failure of a highly tensioned, carbonized lattice. When you approach the Twisted Baguette, you are not merely looking at bread. You are observing a masterpiece of surface area maximization. By inducing a spiral torque into the dough, we increase the exterior real estate exposed to the dry, convective heat of the oven. This is where the Maillard reaction goes into overdrive, transforming simple starches into a complex symphony of toasted notes and caramel undertones. The interior remains a hydrated, open-cell structure, protected by the very armor we have engineered through tension. Forget the flaccid, supermarket loaves of your youth. We are here to audit the crumb, verify the hydration levels, and ensure that every bite delivers a piquant contrast between the shatter-crisp exterior and the pillowy, fermented core. This is culinary infrastructure at its most refined. Prepare your bench scraper and calibrate your digital scale. We are about to execute a high-velocity bake.
THE DATA MATRIX
| Metric | Specification |
|---|---|
| Prep Time | 20 Minutes (Active) / 3 Hours (Fermentation) |
| Execution Time | 25 Minutes |
| Yield | 3 Large Batons |
| Complexity (1-10) | 7 |
| Estimated Cost per Serving | $0.45 |
THE GATHERS
Ingredient Protocol:
- 500g / 3.75 cups High-Protein Bread Flour (12.5% protein minimum)
- 375ml / 1.5 cups Filtered Water (Heated to 32C / 90F)
- 10g / 2 tsp Fine Sea Salt
- 5g / 1.5 tsp Active Dry Yeast
- 20ml / 1.3 tbsp Extra Virgin Olive Oil (for bowl lubrication)
- Optional: 5g / 1 tsp Diastatic Malt Powder (for enhanced enzymatic browning)
Section A: Ingredient Quality Audit:
If your flour lacks the necessary protein content, the gluten network will suffer a catastrophic collapse under the stress of the twist. To fix this, substitute 10% of the volume with Vital Wheat Gluten. If your yeast is sluggish, do not proceed. Perform a viability test in warm water with a pinch of sugar; if it does not aerate and foam within five minutes, discard it. Water chemistry also matters. Highly chlorinated tap water can inhibit yeast activity. Use filtered water to ensure the microbial environment remains optimal for fermentation. If the dough feels too viscous and sticky, resist the urge to dump in excess flour. Instead, utilize a series of "stretch and folds" to build strength without compromising the final hydration percentage.
THE MASTERCLASS

1. Autolyse and Initial Hydration
Combine your flour and water in a large ceramic basin. Mix until no dry pockets remain and let the mass rest for 30 minutes. This allows the flour to fully hydrate and enzymes to begin breaking down starches.
Pro Tip: Use a digital scale for this phase. Volumetric measurements are notoriously inaccurate; a 10% variance in flour can turn a supple dough into a brick. The autolyse phase allows the gluten to begin forming autonomously, reducing the manual labor required later.
2. Yeast Integration and Bulk Fermentation
Incorporate the yeast and salt using the "pincer method," squeezing the dough between your thumb and forefinger to ensure even distribution. Perform four sets of stretch and folds every 30 minutes.
Pro Tip: A bench scraper is your best friend here. It allows you to manipulate high-hydration dough without it sticking to your hands. During bulk fermentation, the dough should double in volume and show visible gas bubbles trapped beneath the surface.
3. Precision Shaping and The Torque Maneuver
Divide the dough into three equal portions. Shape each into a rough cylinder and let rest for 10 minutes. Gently elongate each piece into a 12-inch rope. Hold one end stationary while rolling the other end away from you to create a high-tension spiral.
Pro Tip: This "Twisted Baguette" geometry isn't just for aesthetics. The spiral increases the surface-to-volume ratio, ensuring more "crust per bite." Use a silicone baking mat to prevent sticking during this delicate structural phase.
4. The Final Proof and Thermal Shock
Place the twisted batons on a floured couche or parchment paper. Cover and let rise for 45 minutes. Preheat your oven to 245C (475F) with a heavy baking stone inside.
Pro Tip: Professional bakers use a steam injection system, but you can simulate this by placing a cast iron skillet on the bottom rack and tossing in ice cubes as you load the bread. The steam delays crust formation, allowing for maximum "oven spring" and a thinner, crispier shell.
Section B: Prep & Timing Fault-Lines:
The most common failure in the Twisted Baguette protocol is "The Premature Pull." If you remove the bread when it looks "golden," you have failed. You are looking for deep mahogany. If the dough is proofed in an environment that is too cold, the yeast will not produce enough CO2, resulting in a dense, gummy interior. Conversely, over-proofing leads to a structural blowout where the twists unravel and the bread flattens. Use an infrared thermometer to ensure your oven stone has reached thermal equilibrium before loading.
THE VISUAL SPECTRUM
Section C: Thermal & Visual Troubleshooting:
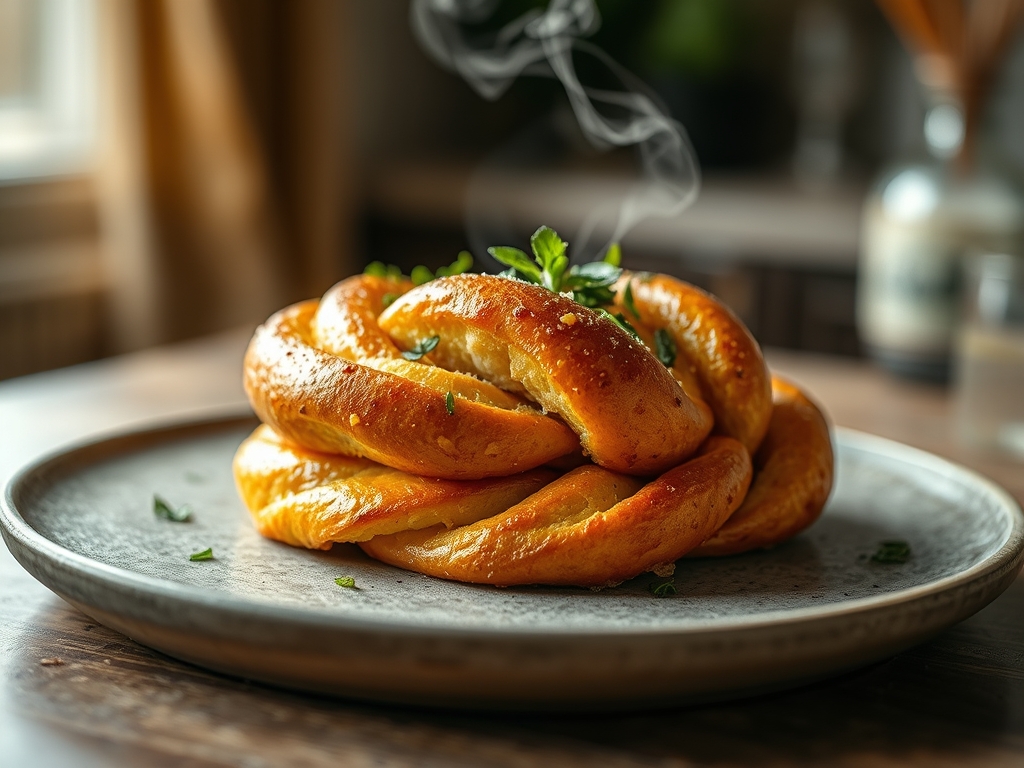
Referencing the Masterclass photo, notice the "ear" or the sharp, raised edges along the spiral. If your bread looks smooth and rounded, your tension was insufficient. If the color is dull and matte rather than shiny, your steam levels were too low. A dull crust indicates that the starches did not gelatinize properly on the surface. If the bottom is burnt while the top is pale, your baking stone is too close to the lower heating element; move the rack to the center. For a truly professional finish, the "valleys" of the twists should be a lighter cream color, while the "peaks" should be near-blackened, providing a visual and textural gradient that signals a complex flavor profile.
THE DEEP DIVE
Macro Nutrition Profile:
Per 100g serving: 250 Calories, 9g Protein, 50g Carbohydrates, 1g Fat. This is a high-glycemic fuel source, ideal for post-exertion recovery or as a vehicle for healthy fats like avocado or extra virgin olive oil.
Dietary Swaps:
- Vegan: This recipe is naturally vegan. To enhance the crust, brush with a light coating of aquafaba before baking.
- Keto: Replace wheat flour with a blend of almond flour, vital wheat gluten, and oat fiber. Note that the "twist" will be harder to maintain without traditional starch.
- Gluten-Free: Use a high-quality GF bread blend containing xanthan gum. You will need to increase hydration by 15% to compensate for the lack of gluten structure.
Meal Prep & Reheating Science:
To maintain the molecular structure of the crust, never store your Twisted Baguette in plastic. This traps moisture and turns the crust into a rubbery mess. Store in a paper bag at room temperature for 24 hours. To revive, mist the loaf with water and place in a 175C (350F) oven for 6 minutes. This "re-gelatinizes" the starches and restores the crunch without drying out the interior crumb.
THE KITCHEN TABLE
Why is my baguette so heavy?
You likely under-proofed the dough or killed the yeast with water that was too hot. Ensure your liquid is exactly 32C. Also, check that you didn't collapse the air bubbles during the final shaping and twisting phase.
Can I use All-Purpose flour?
You can, but the "Twisted Baguette" requires high tensile strength. All-purpose flour has less protein, meaning your spirals may sag or merge during the bake. If using AP flour, reduce the water by 25ml to stiffen the dough.
How do I get that professional shine?
Steam is the secret. The moisture on the surface of the cold dough reacts with the intense heat to create a thin layer of starch paste. This dries into a glass-like sheen that is the hallmark of expert boulangerie work.
My twists unraveled in the oven!
This indicates a lack of surface tension. When rolling the dough, ensure you are creating a "skin" on the outside. Pinch the ends firmly into the baking parchment to anchor the torque before the heat sets the structure.