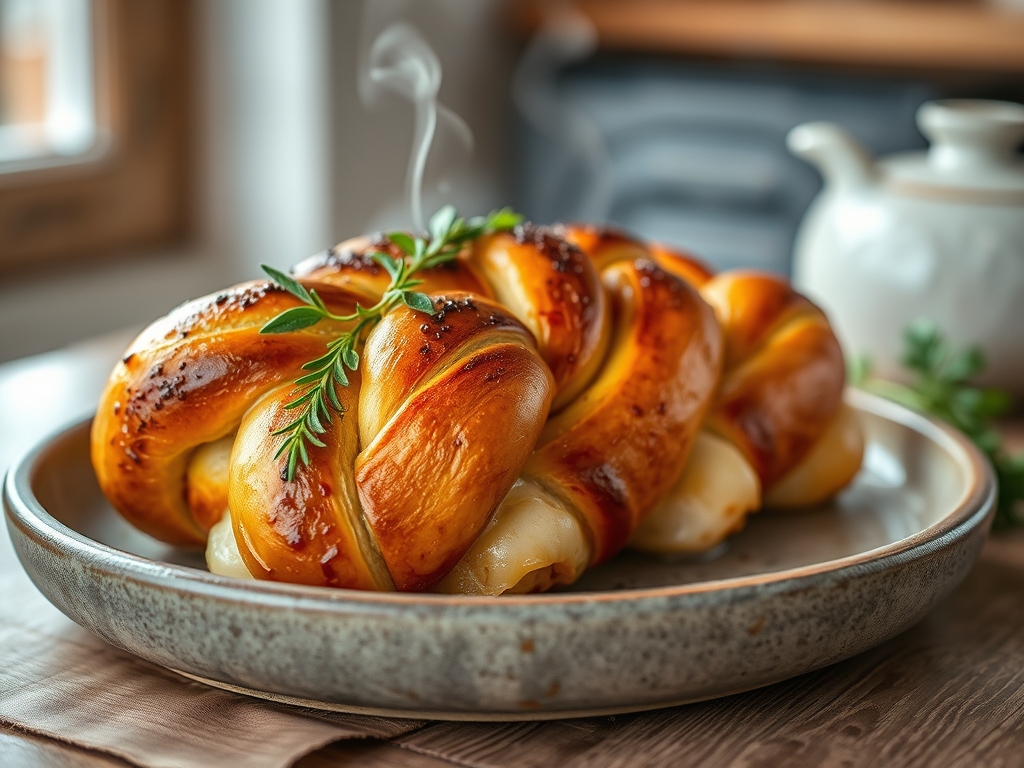
Stop scrolling and put down that flimsy grocery store loaf immediately. We are entering the realm of structural engineering where flour, water, and egg yolk collide to create a golden, pillowy fortress of gluten. This is the Braided Challah Audit; a high-stakes examination of tensile strength and crumb density. If your current bread lacks the sheen of a polished mahogany desk or the internal structure of a high-end acoustic foam, you are failing the audit. We are not just baking; we are managing protein networks and lipid distribution. The six-strand braid is the ultimate test of spatial awareness and dough elasticity. It requires a commitment to the Maillard reaction that borders on the obsessive. We want a crust that crackles with authority and an interior so soft it feels like a culinary hallucination. Prepare to audit your pantry, your technique, and your patience. We are building a masterpiece of edible geometry that demands respect from every corner of the kitchen.
THE DATA MATRIX
| Metric | Specification |
|---|---|
| Prep Time | 45 Minutes |
| Execution Time | 3 Hours 30 Minutes |
| Yield | 2 Large Loaves |
| Complexity (1-10) | 8 |
| Estimated Cost per Serving | $0.45 |
THE GATHERS
Ingredient Protocol:
- 1.1kg / 8 cups High-Protein Bread Flour
- 475ml / 2 cups Warm Water (approx. 40C)
- 15g / 1.5 tbsp Active Dry Yeast
- 150g / 0.75 cup Granulated Sugar
- 120ml / 0.5 cup Neutral Oil (Grapeseed or Canola)
- 3 Large Eggs (Room Temperature)
- 18g / 1 tbsp Fine Sea Salt
- 2 Egg Yolks (For the Glaze)
- 30ml / 2 tbsp Cold Water (For the Glaze)
Section A: Ingredient Quality Audit:
The primary failure point in a Braided Challah Audit is often the protein content of the flour. If you are using all-purpose flour with a protein count below 11 percent, your strands will lack the necessary elasticity to hold a tight braid; they will slump and lose definition during the final proof. Technical Fix: Substitute 10 percent of your flour weight with vital wheat gluten to fortify the structure. Another common audit failure is "Dead Yeast Syndrome." If your yeast does not bloom into a viscous, frothy foam within ten minutes, your water was either too hot (thermal death) or too cold (stasis). Always use a digital thermometer to verify your liquid temperature. Finally, ensure your eggs are at room temperature to prevent the fats in the oil from seizing, which ensures a more homogenous emulsion within the dough.
THE MASTERCLASS
1. The Hydration and Activation Phase
In the bowl of a heavy-duty stand mixer, combine the warm water, sugar, and yeast. Allow the mixture to sit until it becomes viscous and bubbly. Whisk in the oil and whole eggs until the mixture is fully emulsified. Pro Tip: Use a digital scale to measure your flour by weight rather than volume; flour density varies wildly by humidity and packing technique, and precision is the bedrock of a successful audit.
2. The Gluten Network Development
Add the flour and salt to the wet base. Use the dough hook attachment to knead the mass on low speed for approximately 8 to 10 minutes. The dough should transition from a shaggy mess to a smooth, tacky sphere that clears the sides of the bowl. Pro Tip: Perform the "windowpane test" by stretching a small piece of dough; if it tears before becoming translucent, continue kneading to further aerate and strengthen the protein bonds.
3. The Primary Fermentation
Place the dough in a lightly oiled bowl and cover with plastic wrap to prevent skin formation. Let it rise in a draft-free environment until doubled in size. Pro Tip: A professional proofer or an oven with a "bread proof" setting provides the stable thermal environment required for consistent yeast activity.
4. The Strand Calibration
Deflate the dough and use a bench scraper to divide it into twelve equal portions (for two loaves). Roll each portion into a smooth cylinder approximately 14 inches long. Pro Tip: Ensure each strand is tapered slightly at the ends; this allows for a cleaner finish when tucking the braid under the loaf, maintaining the aesthetic integrity of the audit.
5. The Six-Strand Structural Overlap
Pinch six strands together at the top. Follow the pattern: move the far-right strand over two to the left, then the second from the left over to the far right. This rhythmic overlapping creates the high-tension architecture seen in the reference photo. Pro Tip: Keep the braid snug but not tight; the dough needs room to expand during the secondary rise without tearing the surface fibers.
6. The Glaze and Thermal Execution
Brush the braided loaves with a mixture of egg yolks and cold water. Let them rise for another 45 minutes, then apply a second coat of glaze for a high-gloss finish. Bake at 175C (350F) for 30 to 35 minutes. Pro Tip: Use an instant-read thermometer to check the internal temperature; the loaf is structurally sound and fully baked when it hits 88C (190F).
Section B: Prep & Timing Fault-Lines:
Human error often manifests in the "Over-Proofing Trap." If you leave the dough to rise too long, the yeast consumes all available sugars and the gas bubbles become too large, leading to a structural collapse in the oven. If your dough smells overly boozy, you have exceeded the fermentation window. Conversely, rushing the secondary rise after braiding will result in "Oven Spring Rupture," where the loaf expands too violently and cracks the beautiful braided exterior. Timing is a balancing act of biological pace and environmental temperature.
THE VISUAL SPECTRUM
Section C: Thermal & Visual Troubleshooting:
Referencing the Masterclass photo, your challah should exhibit a deep, mahogany-toned crust with lighter, golden highlights in the crevices of the braid. If your loaf is pale and dull, your egg wash lacked sufficient protein; add a pinch of salt to the yolks to help break down the proteins for a more even spread. If the bottom is burnt while the top is raw, your oven has uneven heat distribution. Technical Fix: Place an empty baking sheet on the rack below the bread to act as a heat shield. If the braid looks "fuzzy" or lacks definition, you likely handled the dough too much during shaping, which caused the surface to dry out and tear.
THE DEEP DIVE
Macro Nutrition Profile:
A standard slice (approx. 60g) contains roughly 180 calories, 5g of protein, 28g of carbohydrates, and 6g of fat. While high in refined carbs, the inclusion of eggs provides a modest amount of Vitamin D and Choline.
Dietary Swaps:
- Vegan: Replace the eggs with 150g of silken tofu (blended) and use a maple syrup wash instead of egg yolk for the glaze.
- Keto: This audit is fundamentally incompatible with Keto due to the reliance on gluten networks; however, almond flour and xanthan gum "breads" can mimic the shape, though not the molecular structure.
- Gluten-Free: Use a high-quality 1:1 GF bread flour blend containing psyllium husk to provide the necessary "stretch" for braiding.
Meal Prep & Reheating Science:
To maintain molecular structure, store the loaf in a paper bag for the first 24 hours. For long-term storage, slice and freeze immediately. When reheating, avoid the microwave as it causes the starch molecules to recrystallize into a rubbery texture. Use a toaster oven to re-gelatinize the starches and crisp the crust.
THE KITCHEN TABLE
Why did my braid unravel during baking?
You likely didn't anchor the ends with enough pressure. Use a firm pinch and tuck the seam under the loaf's body. The weight of the dough will keep the tension secure during the expansion phase.
Can I use honey instead of granulated sugar?
Yes, but honey is hygroscopic and will attract moisture, potentially making the dough stickier. Reduce the water by 15ml to compensate for the liquid content in the honey. This will also deepen the crust color faster.
My dough is too sticky to braid. Help!
Do not keep adding flour; this will make the bread tough. Instead, lightly oil your hands and the work surface. This allows you to manipulate the strands without compromising the hydration ratio of the dough.
How do I get that professional shine?
The secret is the double-glaze. Apply the first coat of egg wash immediately after braiding, and the second coat right before the loaf enters the oven. This creates a thick, lacquered protein film that caramelizes beautifully.