Listen to the sound of high-octane gluten stretching under the pressure of a seasoned bench scraper. We are not just baking bread today; we are engineering a structural masterpiece of saturated lipids and fermented air pockets. The kitchen is your laboratory, and the mission is clear: we are constructing the ultimate Curly Focaccia Strips. This is a high-velocity snack designed for maximum surface area and optimal oil retention. Imagine a dough so hydrated it borders on the liquid state, yet held together by a network of protein bonds that would make a bridge engineer weep with envy. We are looking for that specific, piquant aroma of cold-fermented yeast meeting high-phenolic extra virgin olive oil. The goal is a finished product that boasts a glass-shattering exterior crust and a crumb so light it feels like eating a cloud that has been marinated in liquid gold. If you are still using a measuring cup instead of a digital scale, pull over and recalibrate. We are moving fast, and the torque is high.
THE DATA MATRIX
| Metric | Specification |
|---|---|
| Prep Time | 20 Minutes (Active) |
| Execution Time | 18 Hours (Includes Fermentation) |
| Yield | 24 Curly Focaccia Strips |
| Complexity (1-10) | 7 |
| Estimated Cost per Serving | $0.45 |
THE GATHERS
Ingredient Protocol:
- 500g / 3.8 cups High-Protein Bread Flour (12.5% protein minimum)
- 400ml / 1.6 cups Filtered Water (Room temperature: 21C / 70F)
- 10g / 2 tsp Fine Sea Salt
- 4g / 1 tsp Instant Yeast
- 100ml / 0.4 cup Extra Virgin Olive Oil (High-polyphenol count preferred)
- 15g / 1 tbsp Fresh Rosemary (Finely chopped)
- 5g / 1 tsp Flaky Finishing Salt
Section A: Ingredient Quality Audit:
If your flour smells dusty or flat, your gluten network will fail to aerate properly. This results in a dense, leaden strip rather than a light, porous structure. Check the expiration date; old flour loses its ability to hold gas. If your olive oil lacks that peppery kick at the back of the throat, it is likely oxidized. Oxidized oils have a lower smoke point and will impart a "cardboard" flavor during the high-heat bake. To fix sub-par oil, infuse it with a clove of smashed garlic and a sprig of thyme over low heat in a saucier for ten minutes. This masks the flatness and reintroduces aromatic complexity. Finally, if your water is heavily chlorinated, it will inhibit yeast activity. Use filtered water to ensure the biological engine of your dough runs at peak performance.
THE MASTERCLASS
Step 1: The Autolyse Phase
Combine your flour and water in a large glass bowl until no dry streaks remain. Cover and let sit for 30 minutes. This allows the flour to fully hydrate and initiates enzymatic activity without the interference of salt or yeast.
Pro Tip: Use a digital scale for this step. Volumetric measurements are the enemy of consistency in high-hydration doughs. This phase allows the proteins to align, making the later kneading process significantly more efficient.
Step 2: Inoculation and Bulk Fermentation
Sprinkle the yeast and sea salt over the hydrated mass. Use a wet hand to "pincer" the ingredients into the dough. Perform four sets of "stretch and folds" every 30 minutes over the next two hours. This builds the structural integrity required for the Curly Focaccia Strips to hold their shape.
Pro Tip: The "stretch and fold" technique uses gravity to render the gluten strands long and elastic. This is superior to traditional kneading for high-hydration doughs as it preserves the delicate air pockets.
Step 3: The Cold Cure
Transfer the dough to a rectangular container coated in 30ml of olive oil. Seal it and place it in the refrigerator for 12 to 16 hours. This slow fermentation is where the flavor molecules develop, creating a complex, sourdough-adjacent profile.
Pro Tip: Cold temperatures slow down yeast respiration but allow lactobacillus to produce organic acids. This results in a more piquant flavor profile and a superior Maillard reaction during the bake.
Step 4: Geometric Configuration
Turn the cold dough onto a heavily oiled baking sheet. Do not degas it. Gently stretch it into a rectangle. Use a bench scraper to cut the dough into long, thin strips. Twist each strip three times to create the "curly" architecture.
Pro Tip: Twisting the dough increases the surface area exposed to the heat. This maximizes the ratio of crispy exterior to soft interior; a fundamental requirement for the perfect snack infrastructure.
Step 5: The High-Thermal Blast
Preheat your oven to 230C (450F). Dimple the dough with your fingertips, drizzle the remaining oil, and sprinkle with rosemary and flaky salt. Bake for 18 to 22 minutes until the ridges are a deep mahogany.
Pro Tip: Use an infrared thermometer to ensure your baking stone or steel has reached the target temperature. A hot base is essential to aerate the dough instantly, creating "oven spring" before the crust sets.
Section B: Prep & Timing Fault-Lines:
The most common failure point is rushing the room-temperature proof. If the dough is too cold when it enters the oven, it will not expand, resulting in a gummy interior. Ensure the dough has "woken up" for at least 90 minutes after leaving the fridge. Conversely, over-proofing will cause the gluten structure to collapse, leaving you with flat, oily crackers instead of vibrant strips. Watch for the "jiggle" test; if the dough wobbles like gelatin when the pan is shaken, you are in the strike zone.
THE VISUAL SPECTRUM
Section C: Thermal & Visual Troubleshooting:
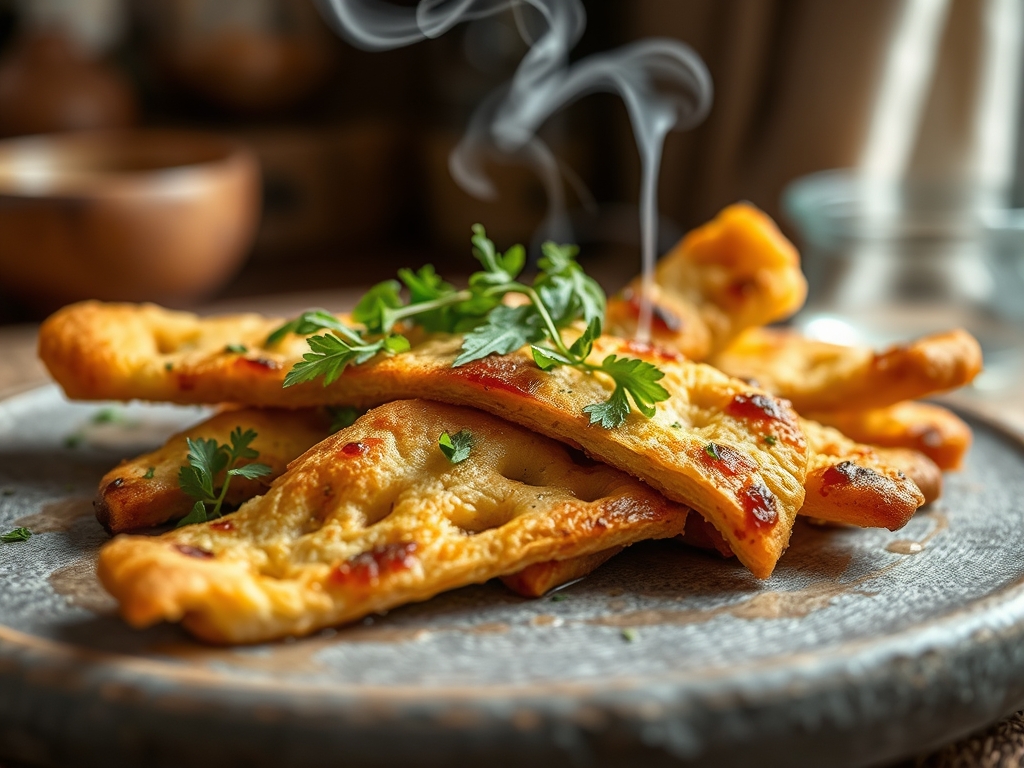
Referencing the Masterclass photo, your Curly Focaccia Strips should exhibit a variegated color palette ranging from pale gold in the crevices to a deep, burnished bronze on the twisted peaks. If your strips are uniformly pale, your oven temperature is likely too low, or you neglected to use enough oil to fry the exterior. If the bottom is burnt but the top is raw, move your rack to the upper third of the oven. The "curls" should look defined; if they have merged back into a single sheet, your dough was likely too warm during the shaping phase. Keep the dough chilled until the final stretch to maintain those architectural spirals.
THE DEEP DIVE
Macro Nutrition Profile
Per serving (2 strips): 180 Calories, 22g Carbohydrates, 9g Fats, 4g Protein. The high fat content comes primarily from monounsaturated olive oil, which provides a sustained energy release compared to low-fat breads.
Dietary Swaps
- Vegan: Naturally vegan. Ensure your sugar (if used to bloom yeast) is bone-char free.
- Keto: Replace bread flour with a blend of almond flour, vital wheat gluten, and xanthan gum. Note that the "curly" structure will be harder to maintain without traditional starch.
- Gluten-Free: Use a high-quality 1-to-1 GF baking flour. Increase the water by 10% as GF flours are highly absorbent.
Meal Prep & Reheating Science
To maintain the molecular structure, do not microwave. Microwaves cause water molecules to vibrate violently, which toughens the gluten and turns the oil greasy. Instead, reheat in a 175C (350F) air fryer or oven for 4 minutes. This recrisps the crust via convection and restores the viscous interior without dehydrating the crumb.
THE KITCHEN TABLE
Why are my strips tough instead of crunchy?
You likely over-worked the dough or used a flour with too much protein. Excessive kneading creates a rubbery texture. Stick to the "stretch and fold" method to keep the protein network flexible and light.
Can I use regular vegetable oil?
Technically yes, but you will lose the flavor profile. Olive oil is a structural ingredient here, not just a lubricant. It provides the necessary fats to infuse the dough with its signature Mediterranean aroma.
My rosemary burnt in the oven. How do I fix this?
Toss the rosemary in a small amount of oil before topping the dough. The oil acts as a thermal shield, allowing the herb to render its flavor into the bread without carbonizing.
How do I get bigger air bubbles?
Increase the hydration and the fermentation time. Water turns to steam in the oven; more water equals more steam, which equals larger pockets. Ensure your oven is screaming hot for that initial spring.